Weekend Gardening: Remember Your Houseplants When Spring Cleaning
April 11, 2015
by UF/IFAS Santa Rosa Extension
Warmer weather signals that spring is here. After months of being cooped up indoors, it’s finally time for gardeners to go dig in the dirt. It’s also time for cooped up house plants to be revitalized.
Locate a shady area for this work. Even if houseplants are to be left out for a short period, after being shut up all winter, leaf damage can occur with only brief exposure to direct sunlight.
First, give the houseplants a bath. Use a soapy solution made of two teaspoons of mild liquid soap mixed with one gallon of water. Wash the leaves and stems, being certain to clean both upper and lower leaf surfaces. Allow the solution to remain on the plants for a few minutes, but rinse it off thoroughly before it is allowed to dry. This not only cleans plants, making them more attractive, but the soap helps to remove aphids, mealybugs and other insects.
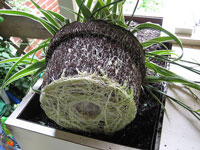
Next, see if your plant needs re-potting. Although some plants require being pot-bound in order to flower eventually all plants outgrow their containers and become root- or pot-bound.
 Why repot in the spring? Plant roots grow most actively in the spring, which means the plant will be able to quickly overcome the shock associated with re-potting.
When repotting, start with a clean, appropriately sized pot. If you want the plant to grow larger, then you will need to repot it in a larger pot. If you want it to maintain its present size, you’ll have to prune its roots.
In general, the pot size should be increased by only about two inches per re-potting. Therefore, a plant whose root ball is in a six inch pot is normally transplanted to a pot with an eight inch diameter. For some reason, drastic changes in pot size when re-potting seems to be detrimental to some plants.
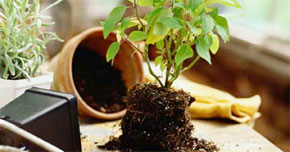
Watering the plant several hours prior will help you remove the plant more easily. Invert the pot and gently remove the plant by grasping the main stem. Give it a slight tug, and it should slip out of the pot. If it doesn’t, use a butter knife or other flat-bladed tool to loosen the sides of the pot and try again.
Once the plant is free of the pot, take the time to inspect the root system. Look for large, old circular roots which can strangle the plant and prevent much-needed nourishment. Sever or remove these old roots to allow new feeder roots to establish.
To re-pot, first add enough new soil mixture to the bottom of the pot to return the plant to its original depth. After the plant is replaced, fill in the sides with new potting soil.
 Use a quality potting mix when re-potting. Gardeners generally rely on commercially available potting soil mixes for growing most types of houseplants. A lot of brands are out there and not all of them are especially good. In particular, avoid heavy, black potting soils. If the bag feels dense and heavy for its size, put it back.
The best potting mixes include vermiculite, bark and perlite in proportions that create a fairly light, loose mix that water penetrates readily but drains rapidly.
If you don’t want to change pots, there is a way of dealing with a pot-bound plant and keeping it in the same size pot. First, remove the plant from the pot and trim off one-quarter to one-third of the lower part of the root ball. Put a layer of fresh potting mix in the bottom of the original container equal to the amount of the root ball removed. Place the plant back in the pot, adding a little more soil around the sides. Water well, and place the plant in a shady location to recover.
House plants would also benefit from fertilization at this time of year. There are many commercial materials available for fertilizing indoor plants. Most are effective and safe if used as directed.


Comments