Plants Some Seeds: Grow A Greater Variety Of Vegetables
February 5, 2011
 Most gardeners know there is a greater selection of vegetables available in seed catalogs than can be found locally. To grow those wonderful plants, however, you must be able to grow your own transplants from seed.
Containers for sowing seeds
It’s important to choose the right containers for sowing seeds. In general, containers should be clean, sturdy and have drainage holes. If you are reusing containers, be sure to sterilize them by soaking them in a bleach solution followed by a thorough rinsing.
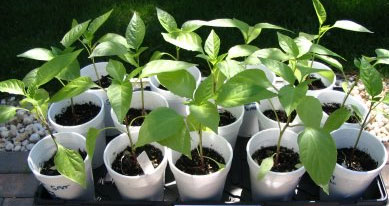
Seeds can be started in flats, pots, old cans, cut-off milk cartons, margarine tubs, egg cartons, or other throwaways.
Peat pots are frequently used, especially for large seeds. Peat pots can be planted directly in the garden, but do not allow the edges of the pot to stick out above the soil. The edges will act as a wick and moisture will evaporate from this exposed surface.
Growing media
The medium used for starting seeds should be well-drained and of fine texture. It is best to use a “soilless” mix since garden soil contains disease organisms that can be highly destructive to small plants.
There are some excellent commercially prepared mixes available for growing seeds. Some gardeners will mix their own soilless media. A 50 percent vermiculite or perlite and 50 percent fine sphagnum peat is excellent for starting seeds.
Fill the container almost to the top with slightly-moistened medium, level it and gently tap the container on a hard surface to settle the soil. Do not compress the soil at any time.
Scatter or broadcast the seeds evenly over the surface. If planting in individual pots, plant two or three seeds per pot (all but one seedling will be pinched off if they all germinate). With larger containers, sow a number of seeds fairly thickly and transplant the seedlings into individual pots later.
Lightly cover the seeds to the depth recommended on the seed package. Label each pot promptly with the plant type, cultivar name and planting date.
Water the seeds in with a fine spray. Then water as needed to keep the medium evenly moist but not soggy. Never let it dry out!
Place the container in a warm location. Generally a temperature range from 65 to 75 degrees is best. Gentle bottom heat can speed germination and can be provided by special heating cables available at nurseries or by mail order.
If your home is dry, it may help to cover the containers with plastic wrap to maintain a uniform moisture level since seeds and seedlings are extremely sensitive to drying out.
Growing the seedlings
 Light is especially critical once the seeds germinate. If the seedlings begin to stretch and look leggy, they are not getting enough light.
It is common to start seeds indoors this time of year when it’s chilly outside. Place the containers of seedlings in the sunniest window you have.
If you don’t have a sunny window, you can grow seedlings using a fluorescent utility light fixture suspended on chains from hooks. Position the fixture 3 inches above the seedlings and leave it on 14 hours to 16 hours a day. Raise the fixture as the seedlings grow.
Water regularly and fertilize seedlings once a week. As soon as the seedlings are large enough to handle, they should be carefully separated and transplanted into individual pots – or if already growing in individual pots, thinned to one plant per pot.
Planting into the garden
When weather conditions are suitable, plant your seedlings in the garden
But remember, plants grown indoors or in greenhouses need to be acclimated to the environment outside before planting. First, place them in a protected shady location and allow them to wilt slightly before watering. Then, over the next 10 days, gradually expose them to more light.
Pictured top inset: Preparing the growing medium. Pictured bottom inset: Master Gardeners arranging trays in the greenhouse. Theresa Friday photos for NorthEscambia.com, click to enlarge.


Comments